We ask you to ensure that the owner and/or project manager are aware of and follow our Installation and Site Requirements found below.
These differ depending on the type of timber flooring or work requested. There are three different sets of installation guides, please select the one pertinent to your floor. They are also included in the Property Owners Guides.
Methods of Installation
Solid timber flooring is direct fixed. However, there are two types of installation for engineered flooring; floating and direct fix. We will advise you which is best for your situation at the quoting stage.
Direct Fix
The direct fix method is when each board is glued firmly to the prepared subfloor. It relies on the stability of the timber board, with appropriately placed expansion gaps to allow for seasonal movement. Generally the total thickness of our direct fix flooring is 14mm for engineered and 19mm for solid timber, this could change depending on your chosen timber. Direct fix floors have a firmer sound to floating floors. Some timbers and subfloors are not suitable for the direct fix method. We will advise you as to which is the best method for your specific floor, in order to ensure no cupping or shrinking occurs.
Floating
Engineered Timbers Only
The floating method is when boards are placed over a reasonably level subfloor of any material. The boards are installed over a 2-3mm of waterproof underlay or plastic sheeting and held in place at the skirting edges. Sound proofing and insulation underlays can also be used, adding to the warmth and comfort of your home. This system was developed to allow the natural movement within a timber floor to take place without restriction and for it to adjust to climatic conditions; appropriately placed expansion gaps enable this. It is not suitable for heavy fixed items, such as kitchen cabinetry or large bedroom cupboards to be installed on top of floating floors, as this would inhibit natural movement. It is recommended that the flooring is installed up to the edge of the fixed item and that skirting boards, toespaces or trims are used to conceal the expansion gap. A floating floor is softer to walk on than one that is direct fixed, marginally quicker and cheaper to install – as we do not need to grind the concrete subfloor or apply a vapour barrier system. The total thickness of a floating floor is approximately 16-18mm from the subfloor, depending on the type of timber chosen.
Subfloors
A subfloor is the structure your wooden floor sits on. Your timber flooring can be installed onto a subfloor of concrete, wood, a manufactured product (such as plywood), or joists.
Concrete Subfloors
Grinding
It is necessary to grind all concrete subfloors to remove contaminates – such as chemicals, paint, glue and silicon – which have a detrimental effect on timber and on the adhesive quality of the glue used to fix the wooden flooring to the subfloor.
Vapour Barrier System
Due to the porous nature of concrete, it is necessary to apply a sealant to keep the amount of moisture coming into contact with the wooden flooring to a minimum. Moisture can cause the timber to swell and effect the adhesive quality of the glue. Neither of these processes is necessary if the engineered flooring is being floated.
Further Information
Swinard Wooden Floors will grind and apply a sealant to your concrete subfloor to ensure it is prepared to the appropriate level required for timber flooring. We design our flooring systems to be as strong as possible and will endeavour to prepare your concrete subfloor to as high a standard as we can.
Other elements within the installation system, such as the substrate, can fail earlier than our glue or the timber. If the concrete is of poor quality (or is uneven) and requires the addition of levelling compounds, this introduces a potential weakness which can reduce the moisture content range the floor can cope with. It is very important that when the concrete subfloor is poured the surface is level (approximately 3mm variation over 3m is allowable). This will minimise the cost of the flooring installation, improve its strength and ensure that there is no need for levelling compounds. Levelling of subfloors must be done by a qualified floor preparation specialist, in conjunction with ourselves. Any levelling work must be done after the subfloor has been ground and sealed. Levelling compound, if applied underneath the concrete moisture sealant, may be weakened by the presence of trapped moisture in the concrete slab. A primer is applied before levelling to ensure a strong bond between the moisture barrier and the levelling compound. The use of moisture barriers over the concrete subfloor, to help prevent moisture migration, is an important aspect of installing a timber floor. If levelling systems (which do not meet the rigid tensile strength requirements for timber flooring) or moisture barrier systems which are not approved or installed by us are used, our guarantee will exclude problems resulting from moisture gain and subfloor failure.
Wooden Subfloors
These will be pre-sanded to ensure a level, uncontaminated surface for the glue to adhere to. Should the subfloor be new and in pristine condition, it may not require any preparation.
Underfloor Heating
Underfloor heating can be used beneath wood flooring. The maximum temperature for this is 24°C or 75°F. Heating temperatures must be adjusted GRADUALLY as any extreme temperature change can damage the floor. For this reason, we recommended that any manual control units are enclosed and positioned so that only experienced people have access to them. Each time the heating is turned on it must be increased gradually. Starting at 15°C, increase the temperature by 1 to 2 degrees per day over a period of 7 days, until the required level is reached – below 24°C. It is recommended that you reduce the temperature in this same manner. The moisture content of the floor should still remain within the acceptable range of 9-13%.
Should you be considering a water controlled system, it is important that the unit is controlled by the temperature of the floor, NOT the temperature of the water in the system. Experience has shown that misuse of temperature controls will prove too much for any wooden floor and will eventually lead to floor failure.
Underlays
Sound Proofing
Various underlays can reduce the impact of noise by acting as a cushion between the wooden floor and the subfloor. It can reduce sound within a room, as well as between levels.
Insulation
Various underlays can insulate your home. Different products are used depending on your environment and your needs. These can be discussed during the quoting process.
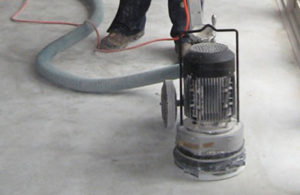
Grinding Subfloor
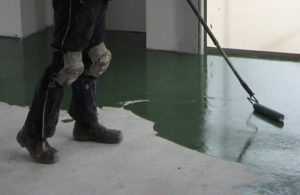
Vapour Barrier
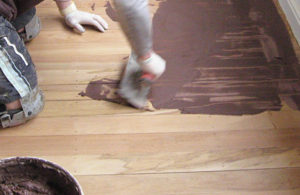
Flood Fill
Sanding and Coating of Solid Timber Flooring
After installation a solid floor will need to be sanded and coated – see Floor Sanding, Coating and Finishing.
Timber Takes Time to Acclimatise to a New Environment
It is often recommended that timber flooring should be given time to acclimatise on site, before installation. However, it needs to acclimatise to the environment of an occupied house and not a building site – the moisture levels will differ considerably. It takes a full year (all four seasons) for timber to acclimatise to its new setting. If you allow your timber to acclimatise to a building site, it will have to adapt again once you occupy the house. All our timber is kiln dried to a level which mimics the 8-10% moisture content level of the average Canterbury home. Please give your floor time to acclimatise to its new home; if it doesn’t settle to the industry accepted standard, then we can address this.
Installation and Site Requirements
We will endeavour to make your wooden floor installation as convenient as possible.
Please click to open the relevant Installation and Site Requirements below.
Installation and Site Requirements
We ask you to ensure that the owner and/or project manager are aware of and follow our installation and site requirements.
We expect our clients to have their site prepared prior to our arrival. Site conditions are extremely important to ensure a high standard of work. These include temperature, humidity, subfloor condition, dampness and dust. Swinard Wooden Floors reserves the right to delay commencement of a job or completion of a floor if conditions are unsuitable.
Please advise us of any specific requirements or expectations that you may have. These may include the time frame, hours of work or security.
All Wooden Floors
- We require two separate 20 amp power plug points to work from.
- Areas where flooring is being installed need to be clean, as well as clear of all materials and other trades people until the job is fully completed. Any exceptions to this must be made by prior arrangement.
- Any silicone or silicone based product which comes into contact with the floor will cause an adverse reaction with the floor coating. Silicone is used by—and therefore can be found on the footwear of – some tradespeople; for example plumbers, glaziers and kitchen installers.
- Please be aware that there will be considerable dust during the sanding process and possibly polyurethane fumes, depending on the polyurethane chosen. Waterborne polyurethane does not give off fumes. We use top of the range sanding equipment with dust bags attached, however dust can still be an issue and you may wish to organise a cleaner after the floor has cured. We suggest closing off areas to prevent dust drifting.
- If you are painting walls and skirting boards, we recommend applying the first two coats prior to floor installation followed by the final coat after your floor is finished. It is important that we sand the floor right up to the walls and this may mark them. Skirting boards and/or walls will require touching up or a top coat of paint afterwards. We cannot be held accountable for any accidental damage or marks to finished paint work. Please ensure that your project manager is aware of this right from the start – we would not want you to have to bear unnecessary additional costs.
New Properties
- We require the building to be fully closed in and all ‘wet’ trades to have finished. All concrete slabs must be cured and we will apply a moisture sealant to them. We prefer to install the floors after all building work is completed but before the final coat of paint is applied to the walls.
- Levelling of floors must be done by a qualified floor preparation specialist, in conjunction with ourselves. Any levelling work required must be done after the floor has been ground and sealed with a moisture barrier. Levelling compound, applied underneath the moisture barrier, may be weakened by the presence of trapped moisture in the concrete slab. A primer is applied before levelling to ensure a strong bond between the moisture barrier and the levelling compound.
- The wooden floors must be completely cured before the carpet is laid. New carpet fibres become airborne and could mar your floor’s finish. We cannot be held responsible for any damage to carpets.
- Heating or air-conditioning systems, that are set into the subfloor, should be checked as operational. However, heating systems must be turned off 48 hours prior to installation and must remain completely turned off for a minimum of 7 days after the job is completed.
See Heating, for further information.
- Skirting boards and toespaces must be left off until the floor is completed. Installation of these is to be carried out by the builder or joiner, unless specifically arranged with Swinard Wooden Floors.
Existing Properties
While every effort will be made to minimise disruption during installation, there will be some inconvenience. This may mean the kitchen, laundry or WC are out of service for a few days. In some instances, it may be wise to vacate the premises during part of the installation and we will discuss this with you.
- If you have a central carpet square, this will need to be removed and re-fitted by a carpet installer. Any new carpet should be installed after your wooden floor has completely cured, as new carpet fibres become airborne and could mar your finish. We cannot be held responsible for any damage to carpets.
- Removal of skirting boards is often necessary before installation and can be refitted or replaced once the floor is completed. Alternatively, a beading can be fitted against the skirting boards. This can either be finished to the colour of the skirting boards or matched to the wood of the floor. The cost of replacement skirting boards and/or beading is not included in your quote. Unless previously discussed and quoted, we presume this work will be carried out by others.
- Close off areas adjacent to the floor laying site to prevent dust drifting.
- Remove everything from the floor installation site to prevent damage and reduce the need for cleaning – including electrical items and window treatments. The work site should be completely cleared.
- The cost of us preparing the work site for you, including moving furniture, has not been included in your quote. We charge an hourly rate for labour, plus the cost of any materials required. We will need to know in advance if you wish us to move items for you, as time will need to be allocated. While all care will be taken with your belongings, Swinard Wooden Floors cannot be held liable for any damage, breakage or loss incurred.
- Remove pets, plants, food and any precious items from the site and surrounding areas, including the food that is in your fridge.
- Subfloor preparation is usually required and is site specific. It could include sweeping and cleaning only, sanding/grinding and the application of a moisture barrier or subfloor levelling. Provision for your specific requirements will be included in your quote. Any unforeseen work under existing floor coverings – such as dry rot, an uneven surface or faulty concrete – are not included in your quote.
- Heating systems must be turned off 48 hours prior to our arrival and must remain completely turned off for a minimum of 7 days after the job is completed.
See Heating, for operation thereafter.
- Turn off all gas pilot lights, including those in hot water cylinders.
- Should a toilet pan need to be removed, if possible, this will be carried out by Swinard Wooden Floors. Its reinstatement will need to be done by a plumber.
Curing Times for Floor Coatings
No one may walk on the floor between applications, even if you think it is dry, as this can cause marks and footprints which may only become visible months later.
Do not spray insecticides, air fresheners or aerosol sprays in the area.
Once the floor has been finished, its care becomes your responsibility.
Waterborne Polyurethane Coating
Ensure all windows and doors remain closed and that the areas are not disturbed for a minimum of 12 hours once the final coat has been applied; no one can walk on the floor for 24 hours. After 24 hours it may be walked on with care – soft soled shoes/socks, not heavy trade boots. Polyurethane is touch dry after 24 hours but takes a full 7 days to completely cure. The floor must not be covered or get wet for a minimum of 4 days, to allow this curing process to take place. We suggest you do not move back into the area for 4 days and that extreme care should be taken for 7 days.
Hard Wax Coating
Hardwax oil takes 3 days to cure at an average room temperature of 18°C. It will take 6 days if the temperature is as low as 10°C.
Initial Protection for your new Floor
If tradespeople are still on site we advise that after the curing period, as stated above, the floor is carefully swept clean of all dust and debris and covered with cardboard – flat side down – until all building work is completed. Do not affix this to the floor with tape, as it may damage the polyurethane or oil coating when removed. You can keep it in place by taping each section of cardboard to the next.
Be aware that you may need to have your doors trimmed after your floor has been installed.
The reinstallation of all toilet pans, appliances and furnishings is your responsibility.
We will leave a tidy work site on completion of your floor. Cleaning of the work site and premises is to be done by others. See Cleaning and Maintenance, for floor care thereafter.
Download our full Solid Wooden Floors Property Owners’ Guide PDF here.
Installation and Site Requirements
We ask you to ensure that the owner and/or project manager are aware of and follow our installation and site requirements.
We expect our clients to have their site prepared prior to our arrival. Site conditions are extremely important to ensure a high standard of work. These include temperature, humidity, subfloor condition, dampness and dust. Swinard Wooden Floors reserves the right to delay commencement of a job or completion of a floor if conditions are unsuitable.
Please advise us of any specific requirements or expectations that you may have. These may include the time frame, hours of work or security.
All Wooden Floors
- Areas where flooring is being installed need to be clean, as well as clear of all materials and other trades people until the job is fully completed. Any exceptions to this must be made by prior arrangement.
- Any silicone or silicone based product which comes into contact with the floor will cause an adverse reaction with the floor coating. Silicone is used by – and therefore can be found on the footwear of – some tradespeople; for example plumbers, glaziers and kitchen installers.
- We suggest that your wooden floor is installed before your new carpets and top coats of paint. While care will be taken of your walls and other flooring during the installation process, we cannot be held accountable for any accidental damage to finished paint work or carpets. Please ensure that your project manager is aware of this right from the start – we would not want you to have to bear unnecessary additional costs.
- Any heating or air-conditioning systems, which are set into the subfloor, should be operational. However, heating systems must be turned off 48 hours prior to installation and must remain completely turned off for a minimum of 7 days after the job is completed.
See Heating, for further information.
New Properties
- For direct fix and floating floors we require the building to be fully enclosed and all ‘wet’ trades to have finished. All concrete slabs must be cured and we will apply a moisture sealant to them. We prefer to install the floor after all building work and painting, apart from the top coat, is completed.
- Skirting boards and toespaces must be left off until the floor is completed. Installation of these is to be carried out by the builder or joiner, unless specifically arranged with Swinard Wooden Floors.
- Levelling of floors must be done by a qualified floor preparation specialist, in conjunction with ourselves. Any levelling work required must be done after the floor has been ground and sealed with a moisture barrier. Levelling compound, applied underneath the moisture barrier, may be weakened by the presence of trapped moisture in the concrete slab. A primer is applied before levelling to ensure a strong bond between the moisture barrier and the levelling compound.
Existing Properties
While every effort will be made to minimise disruption during installation, there will be some inconvenience. This may mean the kitchen, laundry or WC are out of service.
How to prepare for your wooden floor installation:
- We require the removal of all items – including furniture, window treatments and electrical appliances – from the area in which we are to work, in order to prevent damage. It is advisable to empty cupboards. The work site should be completely cleared.
- The cost of us preparing the work site for you, including moving furniture, has not been included in your quote. We charge an hourly rate for labour, plus the cost of any materials required. We will need to know in advance if you wish us to move items for you, as time will need to be allocated. While all care will be taken with your belongings, Swinard Wooden Floors cannot be held liable for any damage, breakage or loss incurred.
- If you have a central carpet square, this will need to be removed and re-fitted by a carpet installer.
- Should a toilet pan need to be removed, if possible, this will be carried out by Swinard Wooden Floors. Its reinstatement will need to be done by a plumber.
- Subfloor preparation is usually required and is site specific. It could require sweeping and cleaning only, sanding/grinding and the application of a moisture barrier or levelling compound. Provision for your specific requirements will be included in your quote. Any unforeseen work under existing floor coverings – such as dry rot, an uneven surface or faulty concrete – are not included in your quote.
- Removal of skirting boards is often necessary before installation and can be refitted or replaced once the floor is completed. Alternatively, a beading can be fitted against the skirting board. This can either be finished to the colour of the skirting board or matched to the wood of the floor. The cost of replacement skirting boards and/or beading is not included in your quote. Unless previously discussed and quoted, we presume this work will be carried out by others.
After Installation
Once the floor has been finished, its care becomes your responsibility.
You can walk on your engineered floor immediately after installation.
If tradespeople are still on site we advise that it is covered with cardboard – flat side down – until all building work is completed. Do not affix this to the floor with tape, as it may damage the polyurethane or oil coating when removed. You can keep it in place by taping each section of cardboard to the next.
Be aware that you may need to have your doors trimmed after your floor has been installed.
The reinstallation of all toilet pans, appliances and furnishings is your responsibility.
We will leave a tidy work site on completion of your floor. Cleaning of the work site and premises is to be done by others.
See Cleaning and Maintenance, for floor care thereafter.
Download our full Engineered Floors Property Owners’ Guide PDF here.
Preparation and Site Requirements
Every effort will be made to minimise disruption during this process, however it may mean that the kitchen, laundry or WC are out of service for a few days. In some instances, it may be wise to vacate the premises and we will discuss this with you. We will endeavour to make your floor repair and/or sanding and recoating as convenient as possible.
We ask you to ensure that the owner and/or project manager are aware of and follow our preparation and site requirements.
We expect our clients to have their site prepared prior to our arrival. Site conditions are extremely important to ensure a high standard of work. These include temperature, humidity, dampness and dust. Swinard Wooden Floors reserves the right to delay commencement of a job or completion of a floor if conditions are unsuitable.
Please advise us of any specific requirements or expectations that you may have. These may include the time frame, hours of work or security.
When recoating your floor only, we will do our utmost to determine what was previously used and use compatible products. However, we cannot be held responsible if there is a reaction between the old product and the new. We would like to point out that this is rarely a problem.
When, in your renovation process, should your flooring be done?
Ideally repairing and recoating your floor should be done before the installation of new carpets, as fibres become airborne and could mar your finish. We cannot be held responsible for any damage to carpets.
If you are painting walls and skirting boards, we recommend applying the first two coats prior to your floor being repaired or recoated, followed by the final coat afterwards. It is important that we sand the floor right up to walls and this may mark them. Skirting boards and/or walls will require touching up or a top coat of paint afterwards. We cannot be held accountable for any accidental damage or marks to finished paint work.
Site Requirements
- We require two separate 20 amp power plug points to work from.
- Areas where flooring is being resurfaced need to be clean, as well as clear of all materials and other trades people until the job is fully completed. Any exceptions to this must be made by prior arrangement.
- Any silicone or silicone based product which comes into contact with the floor will cause an adverse reaction with the floor coating. Silicone is used by – and therefore can be found on the footwear of – some tradespeople; for example plumbers, glaziers and kitchen installers.
- Please be aware that there will be considerable dust during the sanding process and possibly polyurethane fumes, depending on the polyurethane chosen. Waterborne polyurethane does not give off fumes. We use top of the range sanding equipment with dust bags attached, however dust can still be an issue and you may wish to organise a cleaner after the floor has cured. We suggest closing off areas to prevent dust drifting.
How to Prepare the Work Site
- Close off areas adjacent to the floor to prevent dust drifting.
- Remove pets, plants, food and any precious items from the site and surrounding areas, including the food that is in your fridge.
- Remove everything from the work site to prevent damage and reduce the need for cleaning—including electrical items and window treatments. The work site should be completely cleared.
- The cost of us preparing the work site for you, including moving furniture, has not been included in your quote. We charge an hourly rate for labour, plus the cost of any materials required. We will need to know in advance if you wish us to move items for you, as time will need to be allocated. Whilst all care will be taken with your belongings, Swinard Wooden Floors cannot be held liable for any damage, breakage or loss incurred.
- If you have a central carpet square, this will need to be removed and re-fitted by a carpet installer.
- Removal of skirting boards is preferable, though not always necessary or possible, before recoating a floor. If removed these can be refitted or replaced once the floor is completed. Repainting or touching up the paint on skirting boards and toespaces will most probably be required. Alternatively, a beading can be fitted against the skirting board. This can either be finished to the colour of the skirting board or matched to the wood of the floor. The cost of replacement skirting boards and/or beading is not included in your quote. Unless previously discussed and quoted, we presume this work will be carried out by others.
- Heating systems must be turned off 48 hours prior to our arrival and must remain completely turned off for a minimum of 7 days after the job is completed.
- Turn off all gas pilot lights, including those in hot water cylinders.
- Should a toilet pan need to be removed, if possible, this will be carried out by Swinard Wooden Floors. Its reinstatement will need to be done by a plumber.
See Heating, for further information.
Curing Times for Floor Coatings
No one may walk on the floor between applications, even if you think it is dry, as this can cause marks and footprints which may only become visible months later.
Do not spray insecticides, air fresheners or aerosol sprays in the area.
Once the floor has been finished, its care becomes your responsibility.
Waterborne Polyurethane Coating
Ensure all windows and doors remain closed and that the areas are not disturbed for a minimum of 12 hours once the final coat has been applied; no one can walk on the floor for 24 hours. After 24 hours it may be walked on with care – soft soled shoes/socks, not heavy trade boots. Polyurethane is touch dry after 24 hours but takes a full 7 days to completely cure. The floor must not be covered or get wet for a minimum of 4 days, to allow this curing process to take place. We suggest you do not move back into the area for 4 days and that extreme care should be taken for 7 days.
Hard Wax Coating
Hardwax oil takes 3 days to cure at an average room temperature of 18°C. It will take 6 days if the temperature is as low as 10°C.
Initial Protection for your new Floor
If tradespeople are still on site we advise that after the curing period, as stated above, the floor is carefully swept clean of all dust and debris and covered with cardboard – flat side down – until all building work is completed. Do not affix this to the floor with tape, as it may damage the polyurethane or oil coating when removed. You can keep it in place by taping each section of cardboard to the next.
The reinstallation of all toilet pans, appliances and furnishings is your responsibility.
We will leave a tidy work site on completion of your floor. Cleaning of the work site and premises is to be done by others.
See Cleaning and Maintenance, for floor care thereafter.
Download our full Minor Repairs, Sanding and Recoating Property Owners’ Guide PDF here.
